ADF Scanning
The methods and software we present here are all Windows based, if someone would like to write up similar setups for Mac or Linux please do so!
This guide is currently only tailored for the Fujitsu fi-7160, fi-7180, fi-7460, and fi-7480 models. As we find other models that do a good job we'll add methods to use them here as well.
Which Fujitsu Software to use?
If have a fi-7160, fi-7180, fi-7460, or fi-7480 you’ll notice these come with a slew of software from Fujitsu, so which do we want to use? We have found that the consumer grade “Scansnap Manager Software” produced better results than the professional “ScandAllPro” software did. It’s also MUCH simpler to configure. There is one benefit to ScandAllPro though and it’s that it will accept documents that have a length longer than A3, whereas “Scansnap Manager” just gives up at that point and cuts it off. Scanning documents longer than A3 is a rare occurrence however, so we recommend using “Scansnap Manager” for everything else.
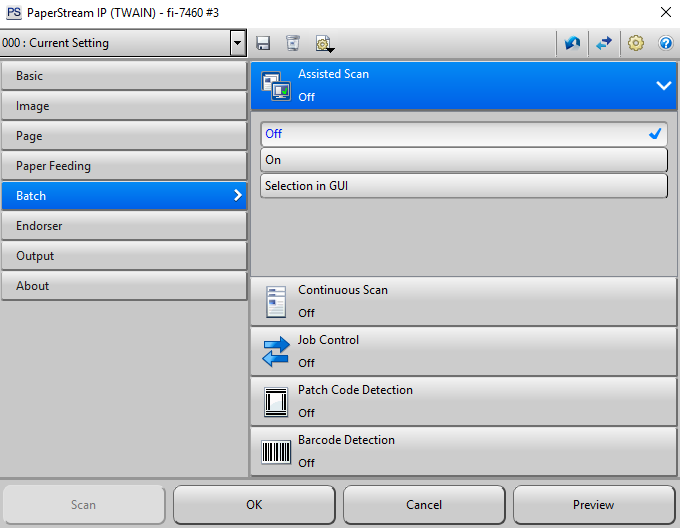
Scansnap Manager Configuration
Upon launch “Scansnap Manager” will usually start in your taskbar and not actually show an application window. So you’ll need to go there and double-click the green ScanSnap icon. Each of the tabs have configuration options.
Use Quick Menu - Uncheck to disable.
Application Tab – Set this to Scan to Folder.
Save – Choose the folder you want your scans to go in and change the file naming format if you wish.
Scanning – Here are the recommended settings for a color document that's duplex (printed on both sides). If the document is grayscale or non duplex, then change it in those cases temporarily.
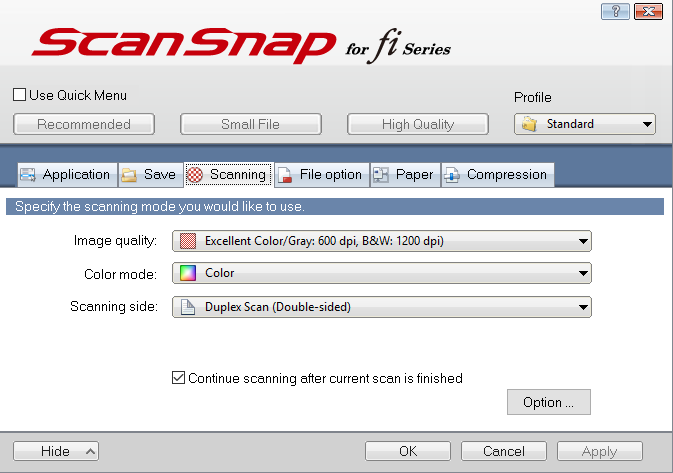
File Option - Set this to save your files as JPEG.
Paper Size - This one is a bit tricky. For most uses Automatic will work okay but we’ve noticed with manual pages it sometimes gets too aggressive and will cut things off. So we recommend to scan the manual in twice, first with Automatic as it straightens and crops the manual pages, which saves a lot of work. Then rescan the manual with custom set page sizes that are larger than the document being scanned, so it captures all of it without cropping. Keep those larger scans as your RAW untouched images, which can be compressed together into a ZIP file and included with your uploads. We really recommend going the extra mile and doing this so RAW scans exist for people to use that won't be cut off or can be edited later for various uses. As mentioned above you can create Custom Sizes to cut down on the extra space it will scan in to make your file sizes smaller, for example for NES/Famicom Manuals a great custom size is 6×6 inches which usually captures those completely as well as a small border. Experiment and create your own (please share custom sizes that work for you!), and again this is usually only necessary with smaller manuals. For some reason full size pages are rarely aggressively cropped with the Automatic setting, but it’s a good idea to always keep an eye out for this.
Multifeed Detection - Set it to Check Overlapping [UltraSonic].
Compression – Set this to 1, that gives you the largest file sizes and the lowest JPEG compression, making our scans look as good as possible.

Once you set all of these then put your pages in your ADF with your cover page facing you and the guides locked in. Then hit your scan button and it should start feeding your scans through. Notice if you do over 100 pages it will error out and ask if you want to delete your scans. Just tell it No, and it will keep everything. Under 100 it will just ask you to confirm everything, if it misfeeds it should notify you and we honestly just recommend redoing your current batch, or figure out which pages are missing and start from there. As long as you don’t need to adjust your configuration you can simply hit the Scan button from here on out and it will do it without adjustments.
ScandAll Pro Settings
Again we do NOT recommend ScandAllPro for scanning with your Fujitsu scanners due to the fact that it produces worse quality and more JPEG artifacts than ScanSnap Manager. It’s only useful when you are scanning very long documents as it will not cut them off. Another benefit it does have though is it doesn't aggressively crop like ScanSnap Manager does. But due to the compression as well as other random issues it has we don't recommend using it unless you have to.
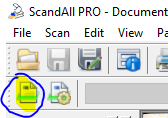
To configure it you’ll need to go to the “Scan Options” along the toolbar and click it.
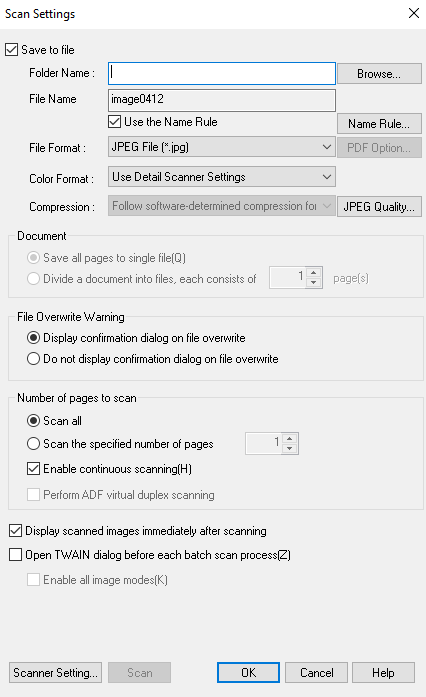
Another window will popup and just configure it like this
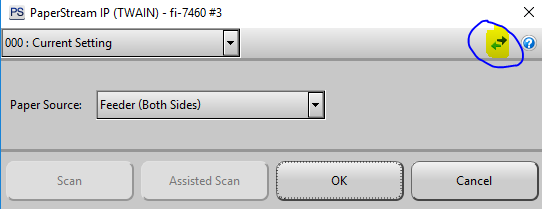
Close out of that window, then you’ll choose another option on your toolbar:
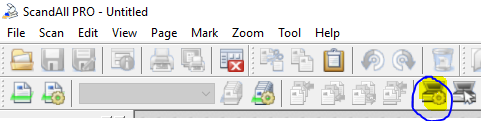
That will bring up this window which you’ll click the circled area:
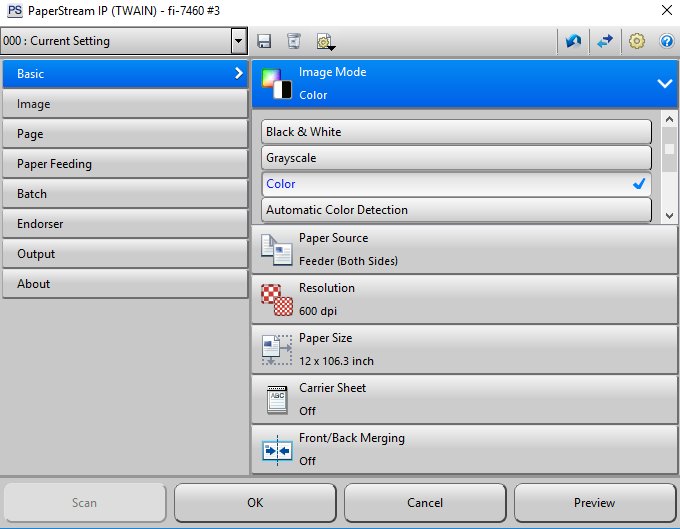
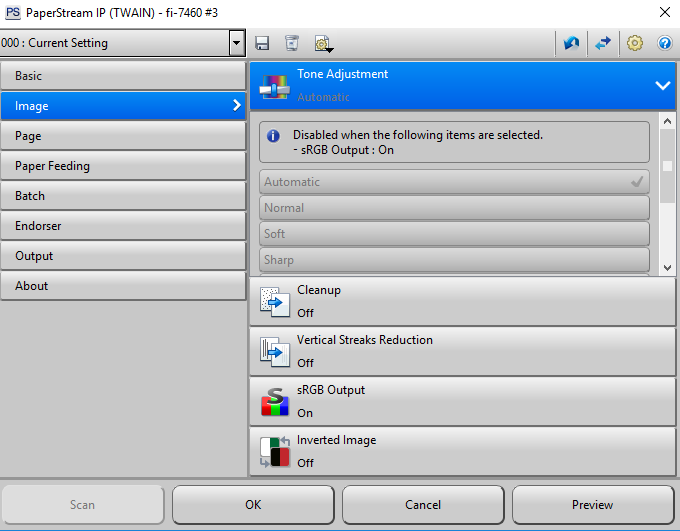
Mimic the settings in these screenshots on each tab:
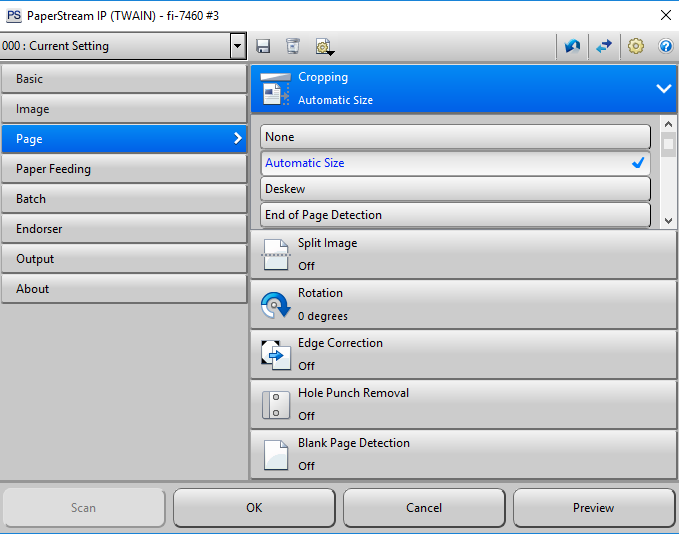


Make sure you hit the disk icon to save the changes to your profile then click OK.
After all of that you’ll be back at the main screen, click the scan icon located here
The software will begin scanning and once finished ask you if you’re done and if you want to continue scanning and then save your scan. Again you only want to do this for long documents that cannot be captured in ScanSnap Manager.
Creating PDFs from your Scans
You have successfully scanned a manual, congratulations! Now we want to take these scans and make them into a nice looking PDF file that is ordered correctly. More than likely what you’ll have scanned is a two page spread that will need to have the pages split and reordered. Luckily we can make that happen with some scripts and software without too much work.

The picture above shows a manual for Ys 3 for the Super Nintendo scanned with ScanSnap Manager and the settings described above. The images are scanned sideways and out of order, so let's fix that!
First step is to losslessly rotate all the pages with some software. We have had good results with FastStone Image Viewer, but there are many other solutions out there. Once in that software point it to your scans folder. Hold down CTRL and select every other image and then right click them, select Tools – JPEG Lossless Rotate – Rotate Left or Right (Depending on whatever direction I need) and then repeat that again for the other pages (as you’ll notice the rotations alternate due to the duplex scanning).

Now that our images are lined up properly we can split them. For that we’re going to use a cross platform open source software called ImageMagick. Download and install this and then you’ll have the ability to run it from the command line.
We have a collection of Powershell scripts to use for this, they are all in a ZIP file.
A short description of each script:
**Splitpages.ps1** - Splits all images in a folder 50% horizontally.
**Splitpagesvert.ps1** - Splits all images in a folder 50% vertically.
**renameimages.ps1** - Renames and reorders pages in proper order for left to right page order.
**renameimages2.ps1** - Renames and reorders pages in proper order for right to left page order.
Please note if you have a slower computer and not a lot of RAM these scripts could crash on larger manuals, in that case you might need to split it up into smaller parts and run it on them.
As your pages are now aligned horizontally you should run the Splitpages.ps1 script from the folder the images are in. Make sure ONLY your image files are in the directory or you'll get errors. Once that finishes your pages should be split apart and you need to delete the old un-split images or else you'll run into problems with the next script.
Next run the renameimages.ps1 script. Upon doing that you should have a lot of images starting with “img” in your folder, in the correct order. You can now delete the others starting with “image”.
At this point you should have your images in the proper order and you can create PDF’s from them, or if you might want to do some editing to them in Photoshop before doing that (such as adjusting levels and descreening). Ultimately it’s up to you. You can use Adobe Acrobat to combine images into PDF, another simple way is to use ImageMagick through the commandline:
magick convert img*.jpg output.pdf
If you have any other smart ways to automate this process, please let us know!