VueScan
Scanning Images with VueScan
VueScan is really only recommended when you’re unable to use your built in scanner software such as Epson Scan or CanoScan. This is due to the fact that the manufacturer’s software is generally tuned to get the best results from their own hardware and it’s also free. However this isn’t always possible with some older scanner models or when using Linux or MacOS. VueScan can still be used but it’s a bit trickier to use and might be unstable. It’s also unfortunately not free and for our uses you’ll need to purchase the Professional Edition for it’s RAW scanning capabilities. If you're unable to do IT8 calibration and have the choice of another scanning software we recommend using one of those as the results will be better. Below are instructions on properly configuring VueScan for our uses.
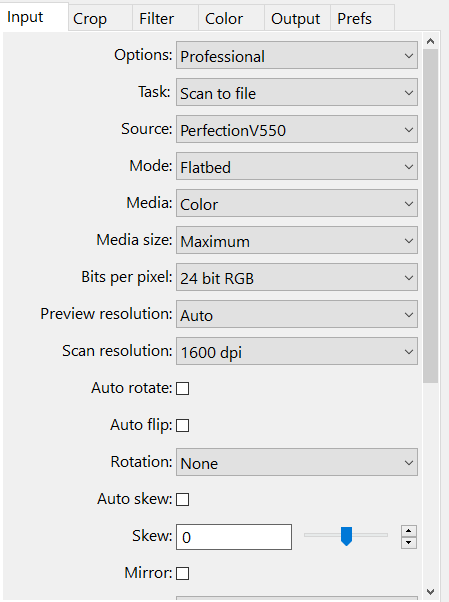
Open up VueScan and make sure to set the Input tab with the following settings. Also below is a screenshot of how it might look (Options differ depending on scanner model used).
- Options: Professional
- Task: Scan to File
- Bits per pixel: 24 bit RGB (You can do up to 48 bit RGB if you like but it is not recommended due to the complications it adds. If you're doing 48-bit RAW scans and you aren't going to create an IT8 profile for your scanner DO NOT scan in 48-bit. VueScan’s 48-bit RAW scans alters the curves and gamma of your scans and will make it difficult to fix without a proper IT8 calibration.)
- Scan resolution: Custom
- Scan DPI: 1200DPI or 1600DPI (Depends what your scanner will allow you to pick, go 1200 if you can as 1600 is way overkill but doesn't hurt anything other than file size)
- Source: Make sure your scanner is visible / selected.
- Next ensure the “Crop” tab is set to “Crop size: Manual”.
- Finally in the “Output” tab make the following changes:
- Make sure “Raw file” is the only thing checked for file type.
- Raw file type: 24 bit (You can do up to 48 bit RGB if you like but it is not required.)
- Raw output with: Scan
- Raw Compression: Off
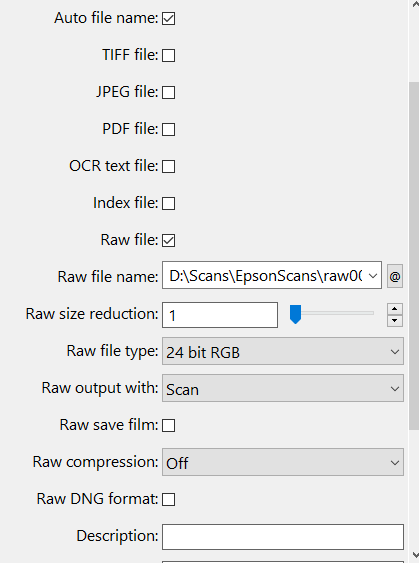
- Make sure to save your settings.
In the bottom left of the app choose “Preview” to see your scan, this might not look like your final output, however don’t worry if the preview looks off, go ahead and draw your cropping box around your image and select the Scan button. Double check that your scanned image is the proper DPI and color bit depth and you’re good to go!